![]()
Overview
Network security has several moving parts. Of those parts, detection and notification are arguably the most important. Detection/notification are usually the first steps in any security strategy, and obviously, you cannot be notified of something you didn’t detect. Today’s Tip-of-the-Week is one article in a series that will help to bridge the gap between detection and notification.
This article focuses on active directory account lockout events and a detection-notification bridge. Lockout events can occur organically through users who have mistyped or forgotten a password, but they can also occur through brute force attacks and targeted attacks.
Regardless of their origin, we need to first detect that a lockout has occurred and then be notified of the event. Below are the steps to configure the detection-to-notification bridge using Powershell and Task Scheduler. *This article assumes that the environment is already configured with an account lockout policy and with failed logon auditing. If not, please use the links provided.
Here are the steps:
- Modify the Powershell script. Everything in bold will need to be modified to match your environment.
*Tip - You’ll notice that we include a quote in the body of the email. We do this for security reasons. Instinctively we’re weary of any email attachment and the quote that’s been chosen lets us know that it’s legitimate. We even change the quote when we changes passwords. Use your own quote or an MD5 checksum, or none at all, it’s up to you. The script can be found below:
#######################Beginning of script#########################
#Declare a location for script. The email attachment will be created here
#Change this to match your environment
$location = "C:\support\scripts"
#Declare the email settings
$To = "youremailaddress@yourcompany.com"
$From = "lockoutalert@yourcompany.com"
$Body = "Quote:Keep your friends close, but your enemies closer. Account lockout event detected."
$Sub = "Account Lockout Event"
$CredUser = "youremailaddress@yourcompany.com@"
#Please note that the password is in clear text. In a future post, we’ll show you how to encrypt it.
$CredPass = "yourpassword" | ConvertTo-SecureString -AsPlainText -Force
$Credentials = New-Object System.Management.Automation.Pscredential -Argumentlist $CredUser,$CredPass
$Attachments = "$location\LockedEvents.csv"
$SmtpServer = "mail.yoursmptserver.com"
$Port = "25"
#Checks for locked out accounts, event id 4740
#Checks the last 1 hours
$events = Get-WinEvent -FilterHashtable @{logname='security';id=4740;StartTime=(get-date).AddHours(-1.0)} | Select-Object -Property "TimeCreated",
@{label='UserAccount';expression={$_.properties[0].value}},
@{label='RemoteComputerName';expression={$_.properties[1].value}}
#Convert events to a number using measure object and select object
$eventcount = $events | Measure-Object | Select-Object -Property Count
#If more than one lockout is found, send email
If ($eventcount.count -ge 1) {
Send-MailMessage -To $To -From $From -Body $Body -Subject $Sub -Credential $Credentials -SmtpServer $smtpServer -Port $Port -Attachments $Attachments
}
#Write to logfile
$events | Export-Csv $location\LockedEvents.csv -Append
Exit
##########################End of script##########################
2. Save the script to the location that is specified via the $location variable.
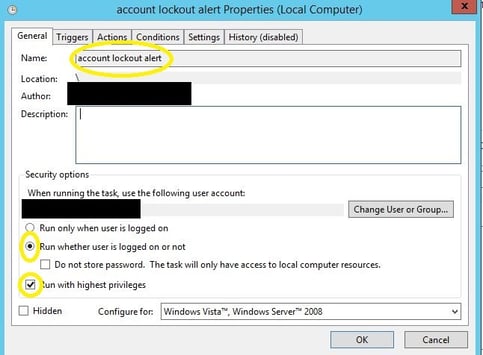
3. Open task manager and select ‘Create New Task’. Give it a proper name and ensure that ‘Run whether user is logged on or not’ is selected and that ‘run with highest privileges’ is selected. Sensitive information has been removed from this graphic.
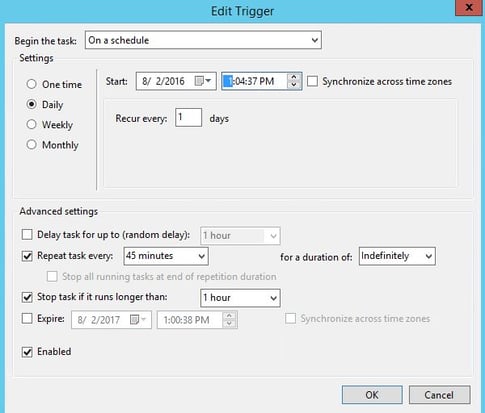
4. Define the Triggers tab. Configure the ‘Repeat task every’ to a value that is less than your account lockout duration. For example, if the account lockout duration is 60 minutes, then configure the task for every 45 minutes.
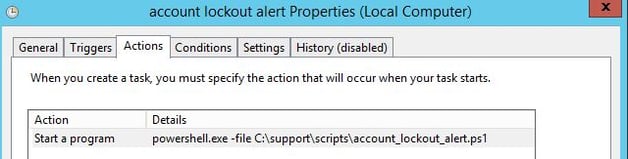
5. Next is the Actions tab. Browse to the location of the script and then append the following to the ‘Program/script:’ section: powershell.exe –file
The entire string will look like this:
powershell.exe -file C:\support\scripts\account_lockout_alert.ps1
6. The rest of the settings can be left at the default settings.
7. Click OK and enter the username and password of the user account. *Note the user account will require ‘run scheduled task/batch file permissions’. Sensitive information removed from screenshot.
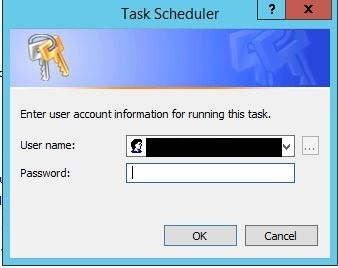
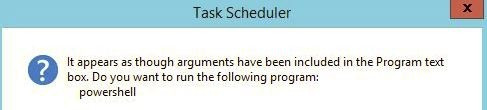
8. Click yes at the next prompt.
9. Next, you’ll need to purposefully lock an account from active directory. With an account locked out simply run the task and you’ll receive an email similar to this:

10. And the attachment will look like this (sensitive information removed):
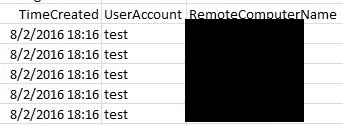
That’s all there is to it. You now have a simple bridge between detection and notification of account lockout events. Stay tuned for next week’s tip, where we’ll build on this script and demonstrate how to block brute force attempts, once again using Powershell.